I use either photoshop or Photomatix to merge the pictures. This is the result for this stack
With the water perfectly still and the little glow on the top it looks like a space ship floating in the air.
My previous post was on Panoramas. Around the same Opera I shot the following image
This image is at the same time HDR and a panorama it is the result of 35 pictures ( 5 images with 7 exposures each ). As one RAW image is 25 MB the stack here is 875MB!!
I then explored the use of HDR as an effect to have images like this one ( picture taken by a friend during her travel in India)
It works but so many have been doing it that I have been bored with it pretty fast! and one day as I was shoting a cactus near Santa Fe, I saw that even with the bracketing done automatically, I could not have exactly the same image because the clouds were moving too fast. As I tried to do the HDR nevertheless I saw lots of "ghost" effects on the resulting image
On the other hand I discovered that when you shoot in RAW you capture more than what you see on a JPEG conversion and that the RAW converter in Photoshop was clipping the histogram. So I decided to generate jpeg images of a single RAW file by changing the exposure ( from -3 stops to + 3 stops with a 1 stop increment ) and I use that as a stack for the HDR process. That approach adds a lot of dynamics to the images by remapping the zones either over or under exposed. After some practice it can be done with a natural result. here is an example.
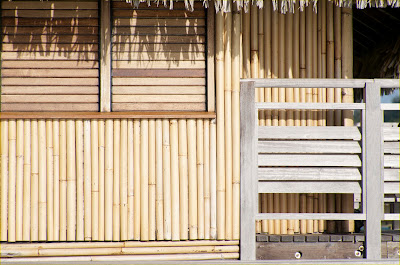
It is the bamboo wall of an hotel room in Bora-Bora. the wood is over exposed in some places and the zone under the roof on the top right is completely dark. I generated those exposures
I then used the the HDR tool and got the resulting tone mapped image
I rebalanced the image to have the following final result
As I shoot always in RAW I very often use this approach that gives more flexibility than the "recover" approach for example


No comments:
Post a Comment